Table of Contents
Toggle🔍 Introduction – how to choose the right anatomy model

how to choose the right anatomy model?, In an age dominated by apps, 3D animation, and AR-based medical tools, you might wonder—why buy a physical model?
Here’s why:
Tactile Learning: Touching and interacting with a model builds memory better than just watching videos.
Instant Clarity: It simplifies complex concepts, especially for beginners and patients.
Reliability: Unlike tech tools, a plastic heart never runs out of battery.
A well-made anatomy model gives students and professionals a clearer, tangible understanding of the human body—and that’s priceless.
🧭 Step 1: Know Your Purpose
Who’s Going to Use It?
Elementary/High School Teachers: Need basic models—colorful, labeled, and easy to understand.
College or Medical Instructors: Should look for advanced models showing detailed anatomical structures.
Doctors or Physiotherapists: Might need condition-specific models to explain treatments to patients.
Where Will You Use It?
In Classrooms: Choose stable, lightweight, and durable models that are easy to pass around.
In Clinics: Opt for sleek, visual aids that simplify patient education.
For Mobile Use or Demos: Go portable—miniature or folding models work best here.
🔢 Step 2: Understand the Types of Anatomy Models
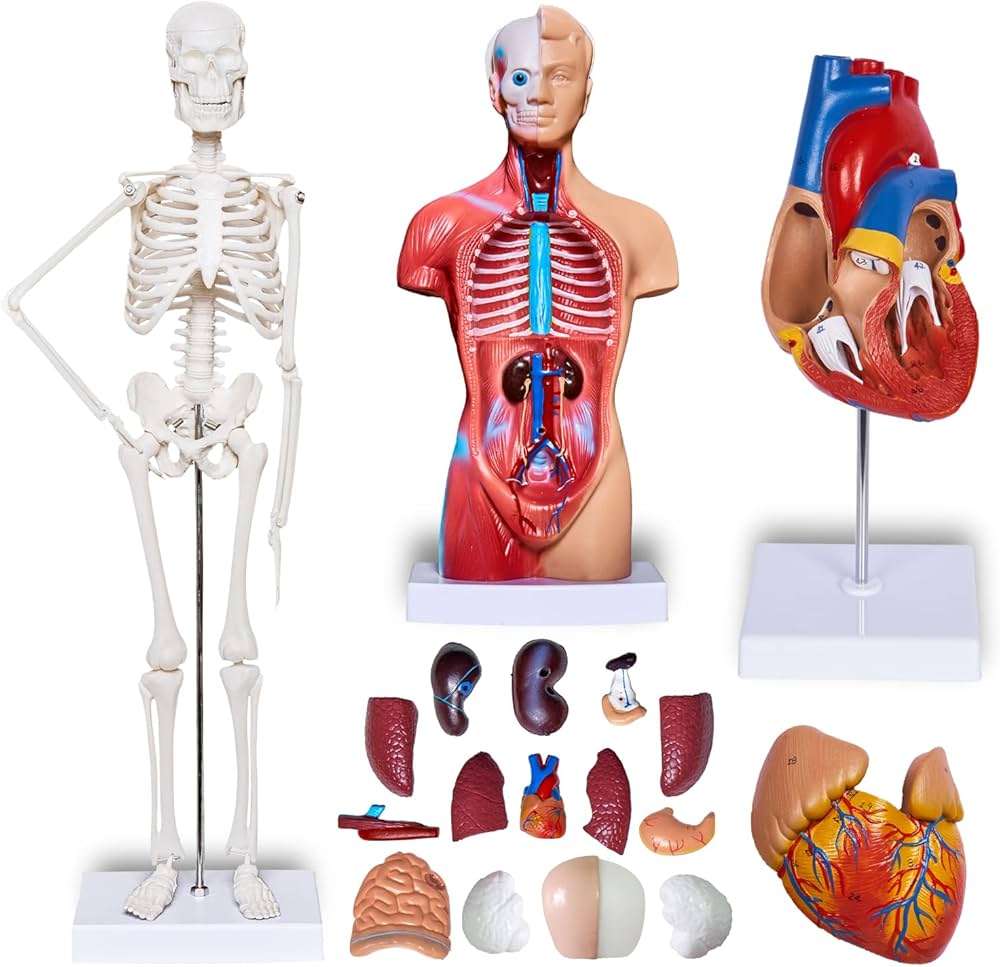
🦴 Skeleton Models
Full-body skeletons for posture, joint alignment, and bone structure.
Great for physiotherapy, sports medicine, and teaching musculoskeletal systems.
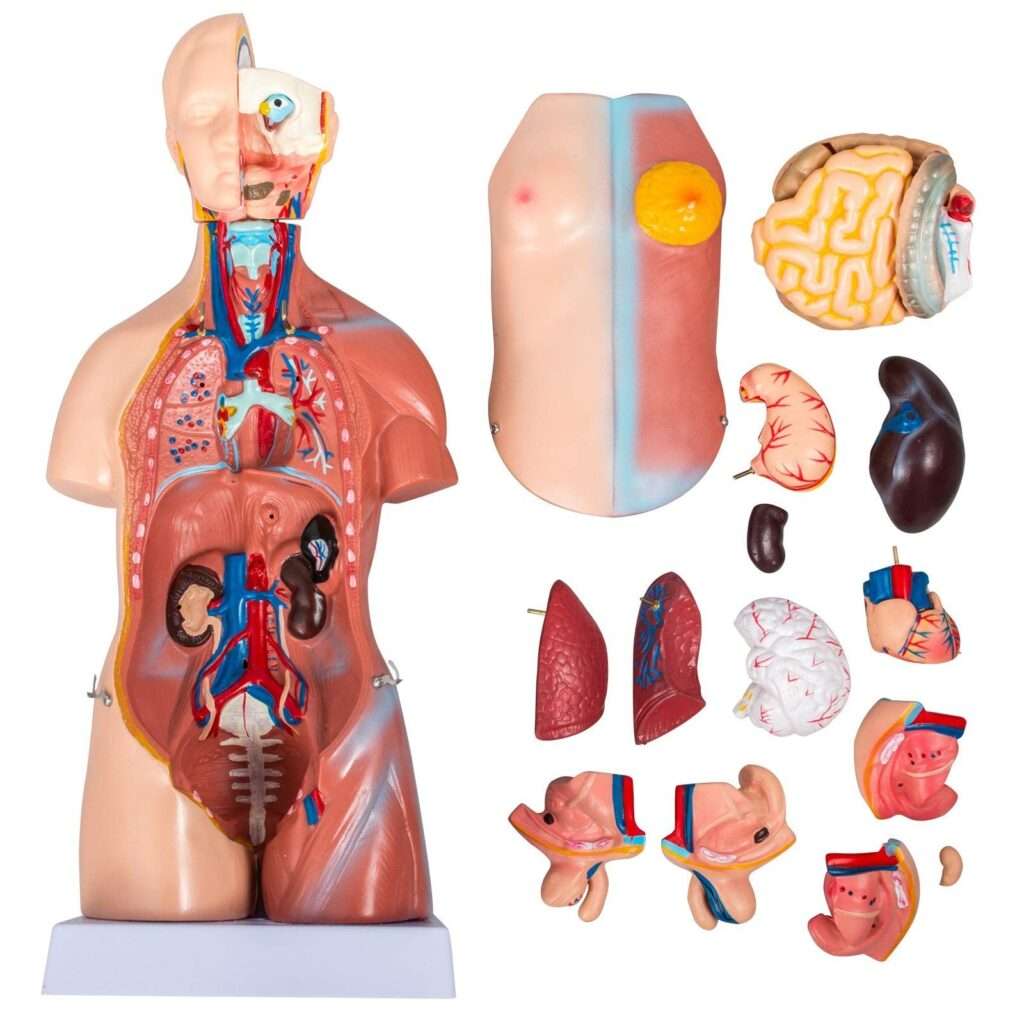
❤️ Organ-Specific Models
Heart models: Show valves, chambers, and circulation.
Brain models: Demonstrate hemispheres, lobes, and nerves.
Useful for cardiology, neurology, or biology classrooms.
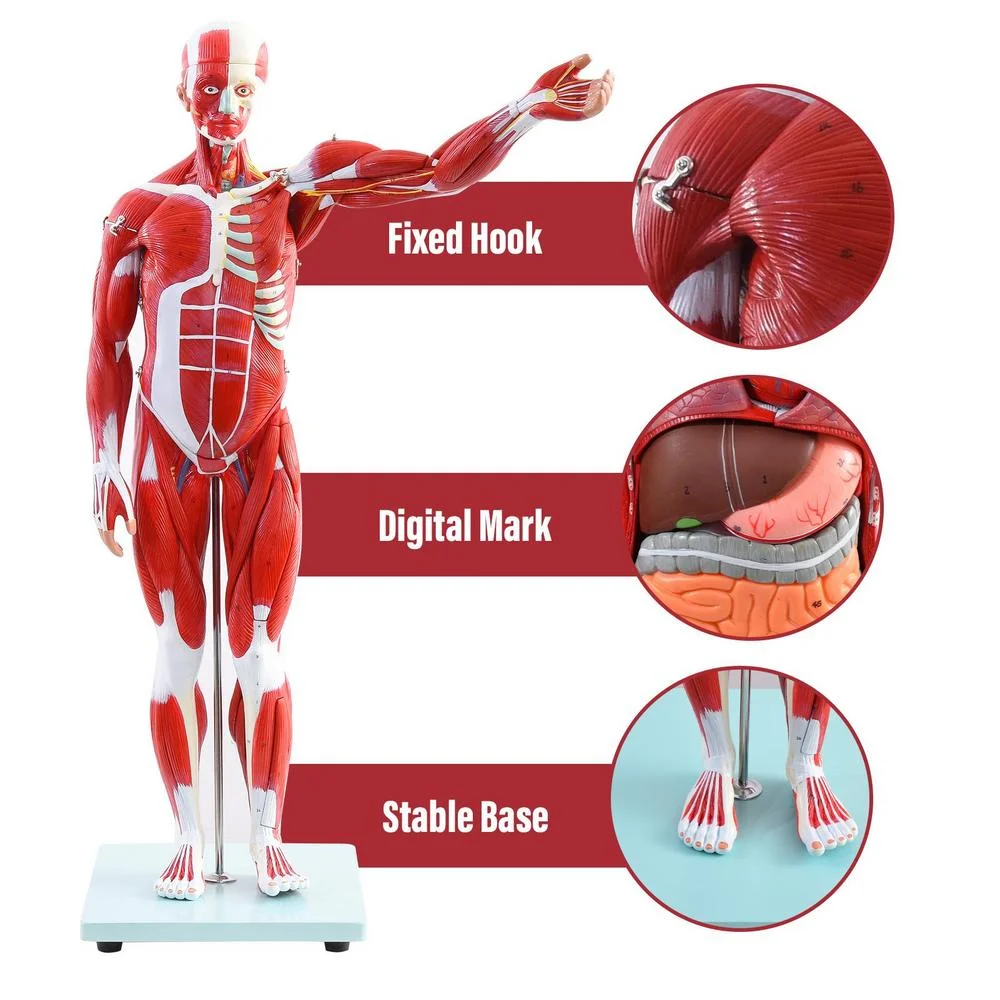
💪 Muscle and Nerve Models
These show the layout and function of muscular and nervous systems.
Ideal for massage therapy, anatomy classes, or orthopedic clinics.
🧍 Regional Models
Focused on one area: head, torso, limbs, etc.
Offers higher detail in a specific zone—perfect for in-depth learning.
🧬 Pathological/Medical Condition Models
Designed to show diseases, injuries, and abnormalities.
Best for patient consultation or advanced medical teaching.
🧱 Step 3: Evaluate the Material Quality
What to Look For:
PVC or Hard Plastic: Long-lasting and easy to clean.
Silicone or Rubber: Flexible and more realistic but less durable.
3D Printed: Offers cutting-edge accuracy but may be fragile or expensive.
Choose quality over looks—you want it to last through daily use, student handling, and the occasional drop!
📏 Step 4: Choose the Right Size
Life-Size Models
Best for full-body studies, ideal for lecture halls or clinical settings.
A life-size skeleton helps with ergonomic and posture teaching.
Miniature Models
Good for limited space, casual use, or traveling.
More affordable but not always ideal for detailed instruction.
Wall-Mounted Models
Save space while staying visible to an entire classroom.
Table-Top or Standing Models
Great for one-on-one explanations or small-group teaching.
🎯 Step 5: Check for Anatomical Accuracy and Detail
Accuracy is Key
For professionals or advanced learners, make sure the model replicates real human anatomy.
Look for models designed using CT or MRI scan data for the best precision.
Color-Coding and Labels
Beginner-friendly models should be colorful and labeled.
Helps in visual recognition and faster memorization.
🧩 Step 6: Look for Interactivity
Removable Parts
Let users take out and examine organs, bones, or muscles.
Enhances hands-on learning and engagement.
Snap-on or Magnetic Designs
Easier to assemble/disassemble.
Great for repeated classroom use.
💰 Step 7: Set a Budget—but Stay Realistic
What You Can Expect by Price Range:
Under $100: Small, basic models. Good for quick demos.
$100–$300: Classroom-friendly with some removable parts.
$300–$1000: Professional-grade, detailed, long-lasting.
$1000+: High-end, medically precise models for serious training.
Remember—cheaping out might mean buying again in a year. Invest wisely.
📘 Step 8: Match It with Your Curriculum or Medical Needs
For Teachers
Choose models aligned with biology or anatomy textbooks.
Helps students follow along and connects theory with visuals.
For Healthcare Professionals
Select models relevant to your practice. (e.g., dermatologists may need skin cross-section models.)
🏢 Step 9: Choose Trusted Brands
Reputable companies make a huge difference in quality and accuracy.
Top Brands Include:
3B Scientific
SOMSO
GPI Anatomicals
Erler-Zimmer
These brands offer warranties, manuals, and reliable customer service.
🎓 Step 10: Boost Student or Patient Engagement
Why use models?
For Students: Makes learning fun, hands-on, and memorable.
For Patients: Shows what’s happening inside the body—way better than verbal explanations.
Models help bridge the “understanding gap” fast.
🧼 Step 11: Learn to Maintain and Store Your Model
Even the best model needs care.
Cleaning Tips
Use mild soap, a damp cloth, and dry immediately.
Avoid harsh chemicals.
Storage Advice
Keep out of direct sunlight to prevent fading.
Store in boxes or covered stands to avoid dust buildup.
🛒 Step 12: Where Should You Buy Your Model?
Online Shopping
Greater selection and competitive prices.
Always check reviews, return policies, and shipping charges.
Local Stores
You can see and touch before buying.
Ideal for larger purchases or schools with official vendors.
Best option? Research online, buy from a trusted store.
🔍 Step 13: First-Time Buyer Tips
Avoid rookie mistakes:
❌ Common Mistakes
Ignoring scale (buying too big/small)
Forgetting to check if it’s labeled
Buying the cheapest option without reading reviews
✅ Checklist Before Buying
Is it accurate?
Is it labeled?
Will it fit in your space?
Can it be cleaned and stored easily?
✅ Conclusion: Make a Smart Choice That Lasts
Choosing the right anatomy model is all about balancing your goals, budget, and space. Don’t just grab the first thing that pops up on Amazon.
Take time to evaluate who will use it, where it’ll be used, and how detailed it needs to be. The right model can transform learning, simplify medical discussions, and become a long-term asset in your toolkit.
So go ahead—invest in quality, and make anatomy come alive for your audience.
FAQ's
What is the best anatomy model for beginners?
A labeled, color-coded model with basic removable parts is perfect. Look for torso or skeleton models in the $100–$200 range.
Are 3D printed anatomy models accurate?
Yes, especially if made using real human data. But always check the build quality—they can be fragile if made from soft resins.
How do I clean and maintain anatomy models?
Wipe them down with a soft cloth and mild soapy water. Never use alcohol unless stated safe. Store them in a cool, dry place.
Can anatomy models be used for online teaching?
Absolutely! Use them during Zoom calls or recorded videos to demonstrate topics. They help visual learners follow better.
What’s the average lifespan of a good model?
With proper care, a high-quality model can last 7–10 years or more. Durable ones made from PVC or hard resin are the most long-lasting.